When I first started learning React Native, I found it frustrating that there was a lack of simple guides/tutorials to guide through the set-up process. I have created this guide in the hope to faciliate you in your journey of setting up your first React Native app and by combining this with Expo Go the process is simplified significantly. If you would like to use a real device (iOS or android) to run your project so you can see exactly what your users will see you can follow the below steps to create your first React Native App using Expo.
Step 1- Project Creation
To create your first project run this command in your code editor of choice :
npx create-expo-app name of appStep 2- Setting up your Development Environment
Download the Expo Go App from either Google Play or Apple Store depending on what device you have and run the following command in your terminal:
Npm startYou should see a QR code in your terminal, scan the code using your device to open up the Expo Go app
Now you have successfully set up your development environment you are ready to start writing some code and begin developing your first React Native app.
Step 3- Navigation
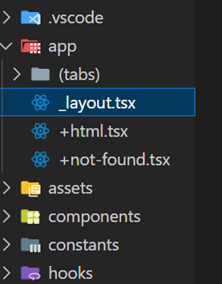
There are a wide variety of navigation available in mobile apps, one of the most popular ones is the tab navigation where as the name suggests tabs are available at the bottom of the screen for ease of navigation. To create your navigation for your app you will need to go to the _layout.tsx file per below screenshot located in your app directory. For examples on how to implement your chosen navigation for your app refer to the React Navigation documentation and follow the instructions provided.
Step 4- Screens
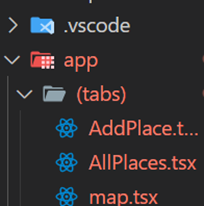
To create the individual screens required for your app you need to create files in the app directory, in the example below I have created a separate tabs folder to contain all the screens for the app for organisational purposes, my screens for my app include ‘AddPlace’, ‘AllPlaces’ & ‘map’.
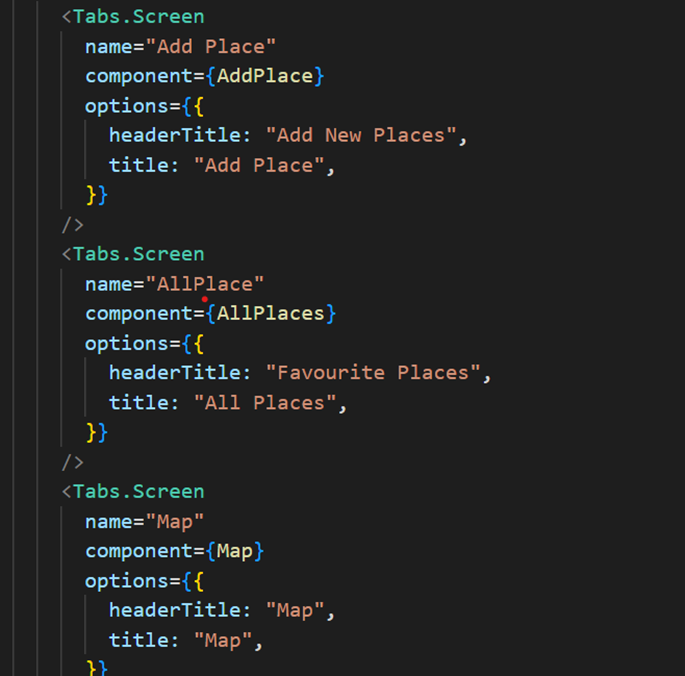
In this example we will be setting up a tabs navigator for the app, in order to set up navigation for the screens, add them to the _layout file:
Congratulations on reaching the end of the post, by now hopefully you would have successfully set up the backbone for your first React Native App and you will be able to move onto the more exciting part of actually building your app. For more tutorials on how to add different functionailities to your app refer to my other posts for helpful guides and tips!